What You Need to Install Synthetic Grass Yourself

A successful DIY synthetic grass installation starts with the right materials and a properly prepared base. We supply everything Newcastle DIY customers need from a single source.
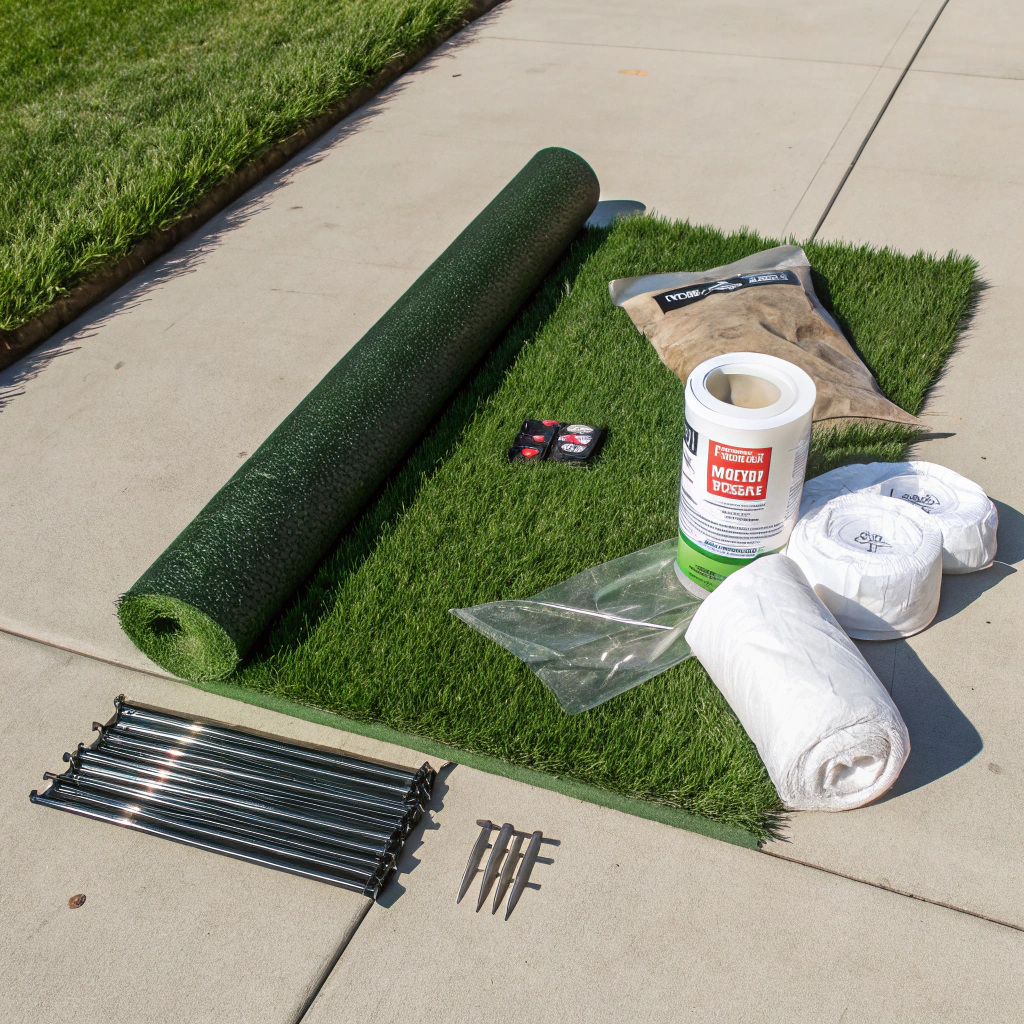
Here’s what a complete installation requires:
- Synthetic grass roll — correct grade and quantity for your application
- Base aggregate — crushed rock and crusher dust compacted to the right depth
- Weed matting — geotextile fabric installed beneath the base layer
- Turf underlay — added cushioning and drainage performance above the base
- Joining tape and adhesive — two-part system for clean, invisible seams
- Fixing nails or landscape pegs — galvanised flat-head nails or U-pegs for perimeter securing
- Silica sand infill — stabilises the turf and keeps pile upright
- Edging materials — bender board or timber for clean perimeter definition

What's Included in a Complete DIY Synthetic Grass Supply Package
We’re a one-stop supply source — no need to visit multiple suppliers or piece together an order from different places. Everything you need for a complete installation is available from us, in one order.
Synthetic Grass Roll: We help you select the correct grade for your specific application and supply the right quantity with waste factored in. You won’t be left short or over-ordering.
Base and Underlay Materials: Crushed rock, crusher dust, weed matting, and turf underlay — each layer plays a specific role in how your finished installation performs and how long it lasts.
Joining and Fixing Supplies: Seaming tape, two-part adhesive, galvanised nails, and U-pegs. These are the materials most DIYers forget to source until they’re mid-install — we make sure you have them from the start.
Infill and Edging: Silica sand infill keeps the pile upright and the turf stable. Edging materials give your installation clean, defined perimeter lines that make the finished result look professional.
Choosing the Right Synthetic Grass Product for Your Project
Product selection is the most consequential decision in any DIY synthetic grass project. Choose the wrong product and there’s no fixing it after installation. We take the guesswork out of that decision entirely.
How to Calculate How Much Synthetic Grass You Need
Quantity errors are one of the most common and costly DIY mistakes. Running short mid-install means delays and additional freight costs. Over-ordering wastes money you didn’t need to spend.
Start with accurate measurements of the full length and width of your area, including any irregular sections. If you’re joining multiple rolls, pile direction has to be consistent across every join — that affects how you orient each roll, not just the total square meterage.
Add a waste allowance on top of your measured area. A straightforward rectangle needs less buffer than an L-shaped yard or an area with curved edges.
If you’re not confident in your calculations, don’t guess. We’ll work it out for you at no charge as part of our pre-purchase consultation.
Not sure how much you need? We’ll calculate it for you — free of charge.

Base Preparation — The Step That Makes or Breaks a DIY Install
Base preparation is where most DIY synthetic grass installations succeed or fail.
Excavation Depth and Soil Removal: Correct excavation depth matters, and so does removing all organic material before you start building your base. Newcastle soil varies significantly — older suburbs like Hamilton and Adamstown tend to have clay-heavy ground that holds moisture, while new estates in Fletcher, Chisholm, and Fern Bay often sit on sandy fill that behaves very differently under a compacted base.
Compaction and Drainage Fall: A plate compactor isn’t optional — it’s what creates the firm, stable base your turf needs. Equally important is getting the drainage gradient right. Poor fall means water pools under the turf, which leads to movement, odour, and a surface that won’t perform the way it should.
Why Most DIY Problems Start Here: This is the insight you won’t get from a hardware store. Base preparation decisions made before a single nail goes in determine how the whole job turns out. Our pre-purchase consultation covers this in detail — so you know exactly what you’re doing before you break ground.
Common DIY Synthetic Grass Mistakes and How to Avoid Them
Getting the base right is half the battle — but there are a handful of other mistakes that catch DIY installers out consistently.
- Skipping or rushing base prep — the surface looks fine at first, then settles unevenly within months. Take the time to compact properly.
- Incorrect pile direction on joined rolls — joins become visible and the finished result looks patchy. Always run pile in the same direction across every roll.
- Under-ordering product — a short order mid-install risks a batch mismatch. Always include a waste allowance in your calculations.
- Inadequate adhesive at joins — joins lift over time, especially in high-traffic areas. Use the full two-part system, not a substitute product.
- Insufficient perimeter fixing — edges lift and shift without adequate nailing. Fix at regular intervals around the full perimeter.
- Skipping infill — pile flattens prematurely and the turf moves underfoot. Silica sand infill is not optional.
Our pre-purchase consultation covers every one of these before you start — so none of them become your problem on install day.
When Professional Installation Is the Smarter Choice
DIY synthetic grass makes sense for a lot of projects — but not every project.
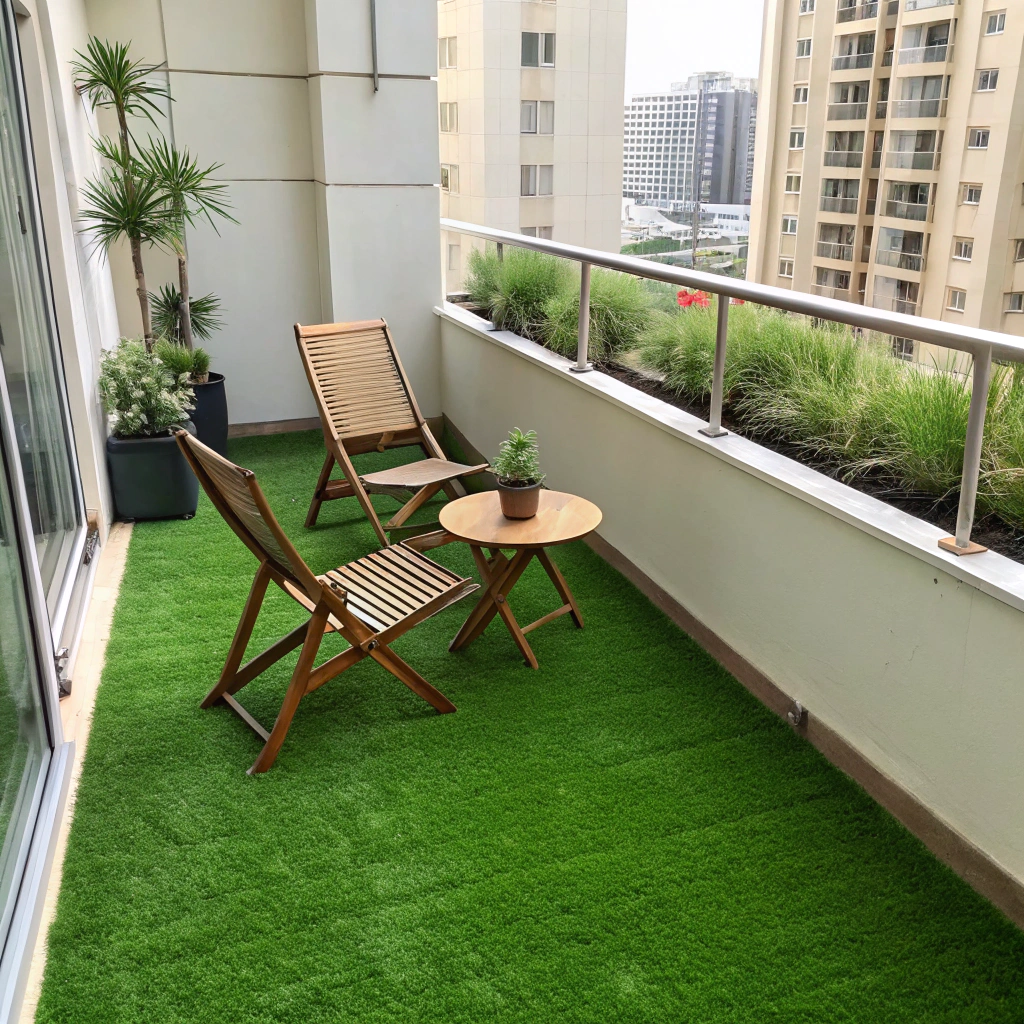
There’s a complexity threshold where DIY becomes a false economy. Large areas over approximately 60–80sqm involve more joins, more material handling, and significantly more base preparation work than most homeowners anticipate. Complex shapes with multiple joins, sloped yards that require drainage engineering, pool surrounds, and balcony or rooftop installations all carry a higher risk of a costly redo if something goes wrong.
Professional installation costs more upfront. What it eliminates is the risk of pulling up a finished job and starting again — which costs more than getting it done right the first time.
We offer both supply-only and full installation. If you’re not sure which option suits your project, talk to our team. We’ll give you an honest read on whether DIY is the right call — no pressure either way.
Not sure whether to DIY or go professional? Talk to our team — no pressure, honest advice.
Supply Options for Newcastle DIY Customers — Retail and Trade
We supply DIY customers ranging from homeowners doing a single backyard project to tradies supplying multiple jobs. We have two clear pathways to suit both.
Retail Supply for Homeowners
Single project supply with expert product selection assistance, accurate quantity calculation, and a full materials package. Our pre-installation consultation is included — you’ll have the right products, the right quantities, and the right knowledge before you start.
Trade Supply for Subbies and Small Operators
Trade pricing is available for contractors supplying multiple jobs. We’re Newcastle-based, so there are no freight delays or interstate lead times to factor into your project schedule. Reliable stock levels and relationship-based account options make us a straightforward supply partner for small operators who need consistency.
Frequently Asked Questions
You don’t have to, but it makes the process significantly easier. When everything comes from us, we can confirm the materials are compatible, the quantities are right, and nothing gets missed. Piecing together an order from multiple suppliers is where DIY projects run into problems.
It depends on how the area will be used. We’ll ask you a few straightforward questions about your application, traffic levels, whether you have pets or kids, and your drainage situation — then point you to the right product. You don’t need to figure that out on your own.
Yes, and we do it at no charge. Give us your measurements and we’ll work out the right quantity with waste factored in. It’s one of the most common sources of costly errors on DIY projects and takes us minutes to sort out.
You’ll need to excavate to the correct depth, remove all organic material, lay your base aggregate, compact it with a plate compactor, and establish the right drainage gradient before any turf goes down. We walk you through the specifics for your project during our pre-purchase consultation.
In most residential applications, yes. Underlay adds cushioning underfoot and improves drainage performance above the base layer. For some applications like balconies or courtyards, the recommendation changes — we’ll advise you based on your specific situation.
Pile direction has to be consistent across both rolls — that’s the most common reason seams become visible. Beyond that, a clean cut on both edges, the correct two-part adhesive system, and proper joining tape applied under tension gives you a seam that’s effectively invisible once infill goes down.
Yes. Infill stabilises the turf, keeps the pile upright, and stops the product moving underfoot. Skipping it is a false economy — pile flattens faster and the turf performs well below what it’s capable of.
Ready to Supply Your DIY Synthetic Grass Project in Newcastle?
Get in touch with our team for product advice, a supply quote, and a free pre-installation consultation. We’ll make sure you have the right products, the right quantities, and the right knowledge before you start.
Call us: 02 4072 2364 Service area: Newcastle and Hunter Region
Here’s how it works:
- Get in touch with your project details
- Receive product recommendations and a supply quote
- Pick up or arrange delivery of your complete supply package